I love hummus! I especially love really garlicky hummus! Until today, I had yet to find a homemade garlic hummus recipe that I love more than store bought. I love my Sun-Dried Tomato Hummus and my Roasted Garlic and Red Pepper Hummus recipes, so today I made an attempt at creating the perfect homemade garlic hummus.
The recipe that I usually make just uses a few cloves of crushed garlic, but this time I decided to roast garlic (and a lot of it) to give the hummus the most delicious garlic flavor. I also decided to sneak in some roasted onion as extra assurance that this hummus would be tasty!

Served with some homemade crispy pita chips, I can say that it indeed was. 🙂
Roasted Garlic and Onion Hummus
A smooth and creamy hummus recipe with the flavor of roasted garlic and onion.
Makes 3 1/2 cups
Ingredients
- 4 heads of garlic
- 1 large onion
- 1-2 tablespoons sunflower oil, for drizzling
- 1 (540 ml) can chickpeas, drained and rinsed
- 1/3 cup creamy tahini
- 1/4 cup sunflower oil
- 3 tablespoons lemon juice
- 3/4 teaspoon fine sea salt
Directions
1. Preheat the oven to 400°F.
2. Cut off the tops of each head of garlic to expose the cloves and remove any loose papery skins.
3. Place each head of garlic into a square sheet of aluminum foil and drizzle with a few drops of sunflower oil. Wrap the garlic and place it onto a baking sheet.
4. Peel and cut the onion into 1/2 inch slices. Place the sliced onion onto a sheet of aluminum foil and drizzle with a bit of sunflower oil. Wrap the onion and add it to the baking sheet with the wrapped heads of garlic.
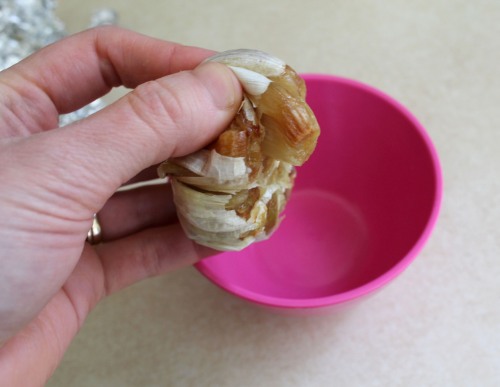
5. Place the garlic and onion into the oven to bake for 40-45 minutes, until the cloves of garlic and slices of onion are soft and golden brown. Allow to cool a while before squeezing out the garlic cloves into a small dish.
6. Place the rinsed chickpeas, tahini, sunflower oil, lemon juice and sea salt together in a food processor. Add the roasted garlic and onion and process on high a few minutes, until smooth. Store in an airtight container in the fridge for up to a week.
The smell of the garlic and onion roasting in the oven sure was making me hungry, but I wanted to wait to have some homemade pita chips to eat the hummus with. It was torture, really.
Homemade Pita Chips
Crispy baked pita chips, perfect for when that snack attack hits. Everything is better homemade!
Serves 3-4
Ingredients
- 2 medium whole wheat pita breads
- 4 tablespoons sunflower oil
- 2 teaspoons garlic powder
- 1 teaspoon dried oregano
- 1/2 teaspoon fine sea salt
Directions
1. Whisk together the sunflower oil, garlic powder, oregano and sea salt in a small dish.
2. Preheat the oven to 325°F and line a baking sheet with parchment paper.
3. Cut the pita bread into small pieces and peel each pita piece in half.
4. Place each piece of pita onto the baking sheet and lightly brush the pita bread with the oil/herb mixture on both sides.
4. Bake for 10-15 minutes, until lightly browned. Allow to cool and become more crisp before eating.
This healthy snack was perfect for my little ballerina to have before her dance lesson this afternoon!
She makes such a darling ballerina!
It was another busy but beautiful day! 🙂


She is beautiful
LikeLike
Looks tasty indeed. And a perfect snack for that cute little ballerina of yours.
LikeLike
Such a lovely ballerina you have. And nice job on the hummus, will have to give a try, we are big hummus lovers in this house.
LikeLike
Pingback: Favorite Fall Recipes | Live. Learn. Love. Eat.
I made this hummus last week, and we all loved it so much! I love hummus, but was getting a little tired of the usual standard recipe so I cracked open your book, saw this, and gave it a try. I’ll definitely be making this again as it was a hit with my husband and both of my girls as well! I like that all of the garlic and onions bulk it up a bit and make it not as stiff as hummus can sometimes get after it sits in the fridge for a day or two. Thanks for another winning recipe!
LikeLike
Thanks for commenting Honey! 🙂 Glad that you liked the recipe!
LikeLike
This looks so tasty! Ive never made homemade houmous before but im definitely trying this out tonight! Thanks for the great recipe!
LikeLike
Thanks for your comment! 🙂
LikeLike