

What a post title! And what an adventure it was making that cake!

I made 5 different cakes! Yes, 5! In total the cake took 6 hours from start to finish, a lot of that being baking time. I made a banana cake, 2 strawberry cakes and 2 maple oatmeal cakes. The cakes themselves are completely healthy and made with maple syrup in place of sugar (yay me) and whole wheat flour. The marshmallow fondant icing however could probably kill you. There is about 5 lbs of icing sugar alone in the icing, not including the marshmallows, but it is delicious and the kids don’t mind. Plus, it looks so pretty! Seriously though, that is A LOT of sugar!

I guess that it smells very sweet!

The kids were extremely high for most of the day and went crazy over the icing sugar! They couldn’t keep their hands out of their mouths and Kesa had icing sugar all over her face.


But a birthday only comes once a year! So this was a super sweet treat!

It all started at 10:00am. My helpers were in position and ready to bake!

We started off by making the banana cake.

Whole Wheat Naturally -Sweetened Banana Cake
Makes one 9″ cake
Ingredients
- 1 1/2 cups whole wheat flour
- 2 teaspoons baking powder
- 1 teaspoon baking soda
- 1/2 teaspoon fine sea salt
- 3 medium overripe bananas
- 1/2 cup pure maple syrup
- 1/4 cup sunflower oil
- 1/4 cup almond milk (or other non- dairy milk)
- 2 teaspoons pure vanilla extract
Directions
Preheat oven to 350F. In a medium mixing bowl combine the flour, baking powder, baking soda and sea salt. In a separate smaller bowl mash the overripe bananas. Add the maple syrup, sunflower oil, almond milk and vanilla. Whisk until combined and add to the flour mixture. Do not over mix! Pour batter into a lightly greased or non-stick 9″ round cake pan and bake 30 minutes or until golden brown and a toothpick comes out clean when you poke it.

Before this cake was even in the oven, I had lost my helpers. Next, I made a strawberry cake.
Whole Wheat Naturally-Sweetened Strawberry Cake
Makes one 9″ cake
Ingredients
- 2 cups whole wheat flour
- 1 tablespoon baking powder
- 1/2 cup pure maple syrup
- 1/4 cup sunflower oil
- 1 1/2 cups pureed strawberries (I used frozen ones that were thawed)
- 1 teaspoon pure vanilla extract
Directions
Preheat the oven to 350F. Combine the flour and baking powder in a medium mixing bowl. In a smaller mixing bowl, whisk together the maple syrup, sunflower oil, pureed strawberries and vanilla extract. Add the wet mixture to the dry mixture and stir until just combined. (Do not over mix the batter or it will not rise properly and the cake will end up flat and tough).

Pour the batter into a lightly greased or non-stick 9″ round cake pan.

Bake 30-35 minutes or until golden. The cake is done when you stick a toothpick in it and it comes out clean.

Last, but not least, is my favorite cake of them all! Maple Oatmeal Cake.
Maple Oatmeal Cake
Makes two 4″ round cakes or one 9″ cake*
Ingredients
- 1 1/2 cups boiling water
- 1 cup rolled oats
Dry
- 1 1/2 cups whole wheat flour
- 2 teaspoons baking powder
- 1 teaspoon baking soda
- 1/2 teaspoon sea salt
Wet
- 1 cup pure maple syrup
- 1/2 cup sunflower oil
- 1/4 cup unsweetened applesauce
- 1 teaspoon pure vanilla extract
Directions
Place the oats in a medium mixing bowl. Pour the boiling water over top of the oats and let soak for 20 minutes. Once the oats have soaked, preheat the oven to 350F. In another medium mixing bowl combine the flour, baking powder, baking soda and sea salt. In separate smaller mixing bowl whisk together the maple syrup, sunflower oil, applesauce and vanilla extract. Add the oats. Stir the wet ingredients into the dry ingredients and mix until just combined. Pour the cake batter into a lightly greased or non-stick 4″ round cake pan. Bake 35-40 minutes, until golden and when poked with a toothpick, the toothpick comes out clean.
* If instead, you are making a 9″ round cake, you may have to bake it a little longer.

YUM!
Now it was time to make the marshmallow fondant, AKA the messy part.
Marshmallow Fondant
Makes enough fondant to cover a 3 layer, 9″ cake and some extra for side decorations
Ingredients
- 450 grams (16 oz) vegan mini marshmallows*
- 3 tablespoons water
- 1/2 cup vegetable shortening
- 1 teaspoon pure vanilla extract (or other flavor extract of your choice)
- 2 lbs icing sugar
*Dandies makes a good vegan marshmallow and that is what I use, but it can get pricey depending on the size of cake that you are making. Here is a link to where you can order them from. I got mine at an Organic Store.

Directions
Place the marshmallows in a large microwave safe dish along with the 3 tablespoons of water and microwave for 1 minute and 30 seconds.


The marshmallows should come out all gooey. If they aren’t quite gooey when you stir them, return them to the microwave another 10-20 seconds.

In a large bowl, mix together the shortening, vanilla and the 2 lbs of icing sugar. Add the marshmallow mixture.

Stir.

Keep stirring… you can clean up the mess later. 😉

Stir until all of the icing sugar is incorporated and the icing begins to resemble a soft dough.

Then it is time to get your hands in there and start kneading! Knead the icing sugar on an icing sugar dusted surface or in the mixing bowl until smooth and no longer sticky. If the icing is still sticky, add more icing sugar.

Next add your color. Place the fondant back into the large bowl and add food coloring. Mix until combined. You will have to get your hands in there to knead the color in as well. Add more icing sugar if the fondant becomes too wet and sticky. Update: A great brand of icing colors is Wilton. They make a concentrated gel so you only need a dab of color and you won’t need to add more icing sugar to the fondant because it won’t get too wet and sticky.

Keep on kneading until the color in fully incorporated and the fondant is smooth. You don’t want to have any color that is not combined when you roll out your fondant, it wouldn’t be pretty. If your fondant becomes too dry you can add a tablespoon or so of water to it. If it is too hard, you can always soften it up later by microwaving it for 10-20 seconds.

At this point, you can grease your fondant with a bit of shortening and place your fondant in a Ziploc bag or wrap it in cling wrap. This icing can be made far in advance and keeps well in the fridge for up to a week if tightly wrapped. When you are ready to use your fondant, simply heat it in the microwave for a 10-20 seconds (longer if you have a lot of fondant, but not too long or it will melt and create a very sticky mess). I wrap mine even if I am using it the same day and keep it wrapped until I need to use it because the air does dry it out.
Now it is back to the cake! Place one of the cakes (layer one) onto a cake stand and spread with icing or jam. I used strawberry jam.


Place the next cake on top. Spread on more jam. Repeat until you have all of your cake layers stacked.

I originally thought that I would just do the two layers and I spread the icing onto the cake, but then decided that I needed more height so I added the final 9″ cake and ended up having to make even more fondant since I had already put my fondant over the icing (oops)!
Next you would spread the cake with an icing so that you fill in the gaps between the cakes and have something for the fondant icing to stick to.

I made a strawberry icing for this cake.
Simply Sweet Strawberry Icing
Makes approximately 3 cups of icing
Ingredients
- 1/4 cup margarine
- 2 1/2 cups icing sugar
- 2 tablespoons almond milk (or other non-dairy milk)
- 1/4 cup pureed strawberries
- 1 teaspoon pure vanilla extract
Directions
In a mixing bowl, combine the margarine and icing sugar together. Add the milk, berries and vanilla extract. Beat until smooth and thick. If the icing is too thin, add more icing sugar until you reach your desired thickness.

Once you have spread your cake with the icing, roll out the fondant color that you are using to cover the entire cake to the appropriate size. You want to make sure that you have enough to cover the circumference of your cake and the height of your cake as well so measure accordingly. I made my cake 3 layers high so I had quite a difficult time rolling it out large enough to cover the cake and draping it over the rolling pin to place on the cake. It took me about 6 tries before I could finally get it to work. YOU DO NEED A FONDANT ROLLING PIN FOR THIS! Saying a prayer might also help. It can get pretty frustrating.

Roll the fondant icing over the edge of your rolling pin and carefully drape the icing over the cake. Sometimes, if there are too many imperfections (stretches, little holes or wrinkles) in the fondant icing, I make more and double the fondant layer over the cake to make it look more smooth.

Cut off the excess fondant with a knife along the edge of the cake and smooth the fondant out with your hands or a fondant smoother (a fancy tool that has really come in handy).

Next you can make your shapes! I used heart and flower shaped fondant cutters to create strawberries for the sides of the cake. You can use cookie cutters too. Roll out the fondant and cut the shapes that you desire.


Stick your fondant shapes onto the side of your cake.


Keep on decorating your cake as you desire. I added white dots to the strawberries for seeds and also made some white strawberry blossoms to go on the side as well. The top layer of the cake I covered in white fondant and cut out red and green circular shapes to go on the sides. I also decided to cut out some longer strips of pink icing to make a ribbon for the top layer and twisted together some green fondant to cover up any imperfections where the cakes meet and add even more decoration. I put one of the girls pink beaded necklace along the bottom to make it even prettier and cover up any minor imperfections..

I used all 6 characters from Strawberry Shortcake. On the top we have Lemon Meringue, Blueberry Muffin and Strawberry Shortcake.

And on the bottom layer we have Plum Pudding, Orange Blossom and Raspberry Torte. I know my Strawberry Girls!

And that is my amazing vegan fondant cake adventure! All in one incredibly long blog post! I hope that this helps somebody. I am not a professional by any means and know nothing about cake decorating. I just decided to google this one day for Autumn’s 5th birthday and watched a few youtube tutorials. If I can do it, you can too! It is a lot of hard work, makes for a lot of dishes as well as sticky floor mess and takes FOREVER, but it is all worth it when you see your child smile.


I am going to have 3 little girls to make cakes for soon. That’s three cakes/year. I might get pretty pro at this so who knows, maybe someday I could make a cake for you. 😉

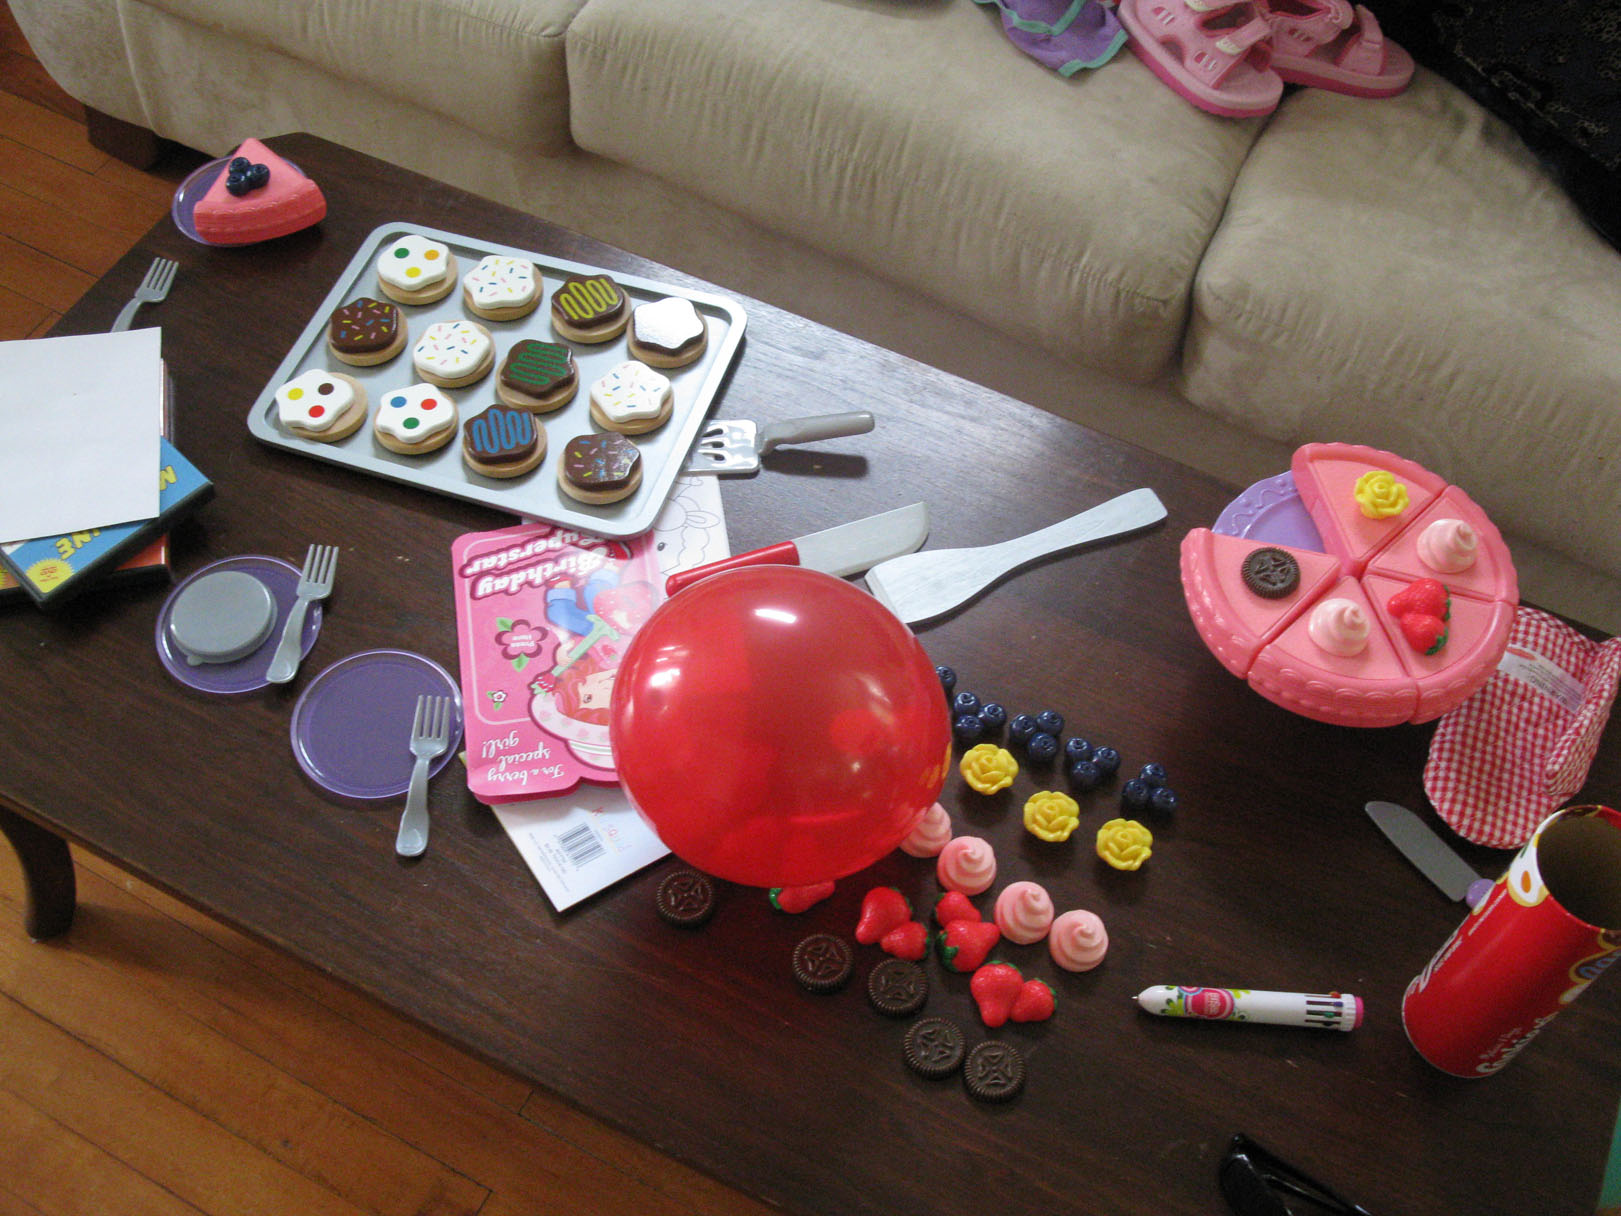
Kesa had a great party yesterday with family and she was very happy.

(Kesa with Autumn and her cousin Becca)
She got a cake of her own to decorate any way she wants and some Melissa and Doug wooden cookies to bake.

The cookies are really neat because they have their own baking sheet, oven mitt and everything! You can change the icing on them too. The girls are having a lot of fun with this.

She also got some Melissa and Doug wooden dress up dolls.

The cake not only looked amazing, but it tasted amazing too! I think this is my best cake yet!


I may or may not have eaten a huge piece or two. One for myself and one for the baby. 😉

And as always, after a birthday party we were all wiped! We had cake for a snack and went off to bed. It was a wonderful day!

